How to Put Antifreeze in an RV Camper (Step-by-Step Expert Guide)
Winterizing your RV properly can mean the difference between a smooth spring startup and thousands of dollars in repairs. One of the most crucial parts of this process is learning how to put antifreeze in an RV camper — the right way.
RV antifreeze keeps your water system from freezing during cold weather. Without it, water left in pipes, pumps, and tanks can expand, burst fittings, and cause leaks that are both costly and time-consuming to fix.
In this step-by-step expert guide, you’ll learn how to safely and effectively add RV antifreeze to your camper’s plumbing system, what tools you’ll need, and how to ensure complete protection for your rig through the winter months.
Why You Need to Add Antifreeze to Your RV
RV water systems are made of flexible tubing, valves, and pumps that can’t handle ice expansion. Even a small amount of trapped water can freeze, crack fittings, and damage components.
Adding antifreeze prevents these problems by:
- Lowering the freezing point of water in your lines and tanks.
- Protecting seals, pumps, and gaskets from damage.
- Making de-winterizing quick and simple in spring.
Tip: Always use non-toxic RV antifreeze, typically labeled propylene glycol, which is safe for potable systems. Never use automotive antifreeze (ethylene glycol) — it’s toxic and unsafe for plumbing.
Types of RV Antifreeze
Before you start, it’s essential to know there are different formulations designed for RV use:
- Propylene Glycol (Pink RV Antifreeze) – Non-toxic, safe for drinking systems, and lubricates seals.
- Ethanol-Based Antifreeze – Cheaper but can dry out rubber seals and cause odor.
- Blended Antifreeze – Combines ethanol and propylene glycol; moderately priced but not ideal for long-term use.
Recommended: Always choose pure propylene glycol antifreeze for best long-term protection and safety.
Tools and Supplies You’ll Need
Gather the following tools before starting the process:
- 2–3 gallons of RV antifreeze (amount varies by camper size)
- Water pump conversion kit or hand pump
- Basic wrench or screwdriver
- Bucket or drain pan
- Towels or rags
- Flashlight (for undercarriage and low areas)
Optional but helpful:
- Air compressor for initial water line blowout
- Funnel for easy pouring
Step-by-Step: How to Put Antifreeze in an RV Camper
Follow these steps carefully to winterize your RV’s water system and avoid damage during freezing weather.
Step 1: Drain All Water from the System
Start by draining all water from the camper:
- Open the freshwater tank drain valve.
- Empty both gray and black water tanks.
- Open all faucets — hot and cold — including the shower and outdoor spigot.
- Remove the drain plug from the water heater and open the pressure relief valve.
Pro Tip: Never add antifreeze to a water heater. Always bypass it to save antifreeze and prevent contamination.
Step 2: Bypass the Water Heater
Most RVs have a bypass valve or a kit near the water heater. Turn the valve so that antifreeze will flow around, not into, the heater.
If your camper doesn’t have a bypass, install one — it’s inexpensive and saves 6–10 gallons of antifreeze each season.
Step 3: Drain and Disconnect the Freshwater Tank
Make sure no water remains in the freshwater holding tank. Use a low-point drain to clear lines completely.
Then, close all drains and prepare to draw antifreeze into the system via the pump or an external hand pump.
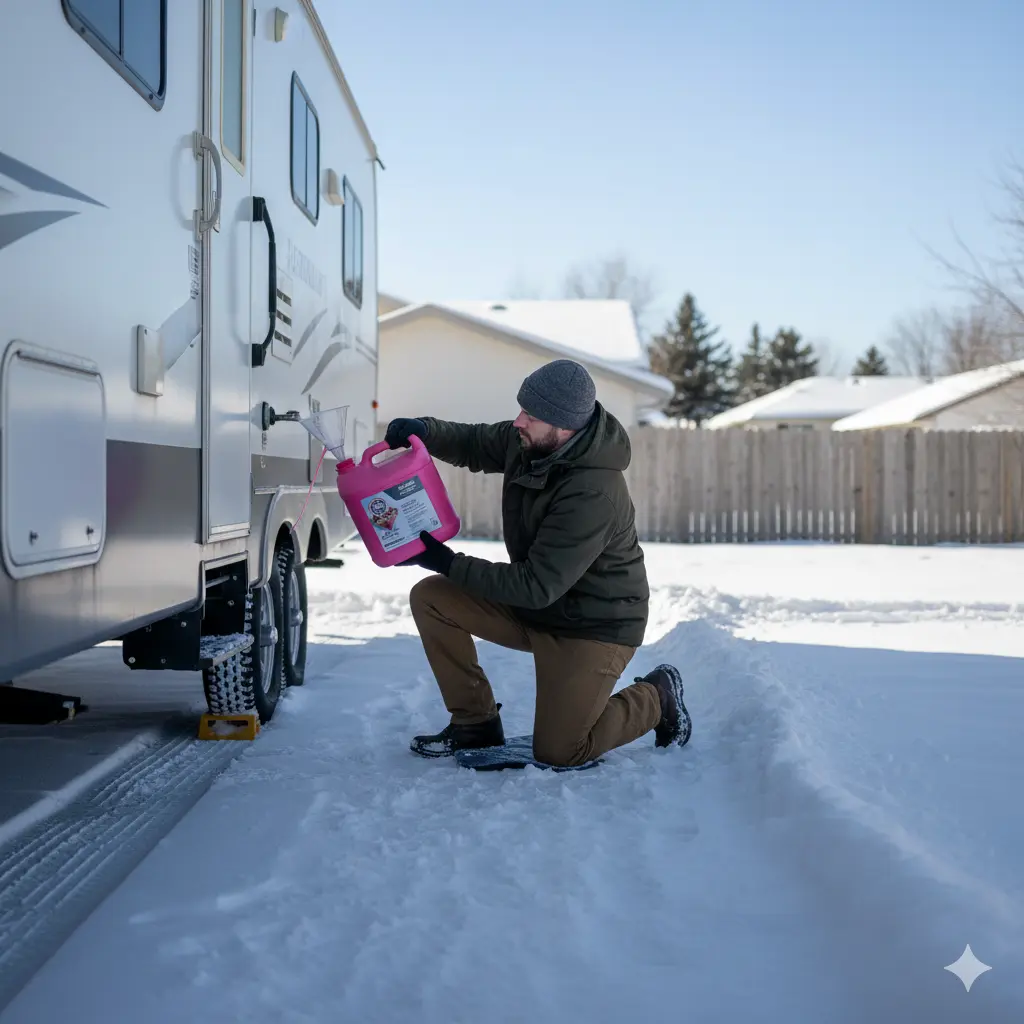
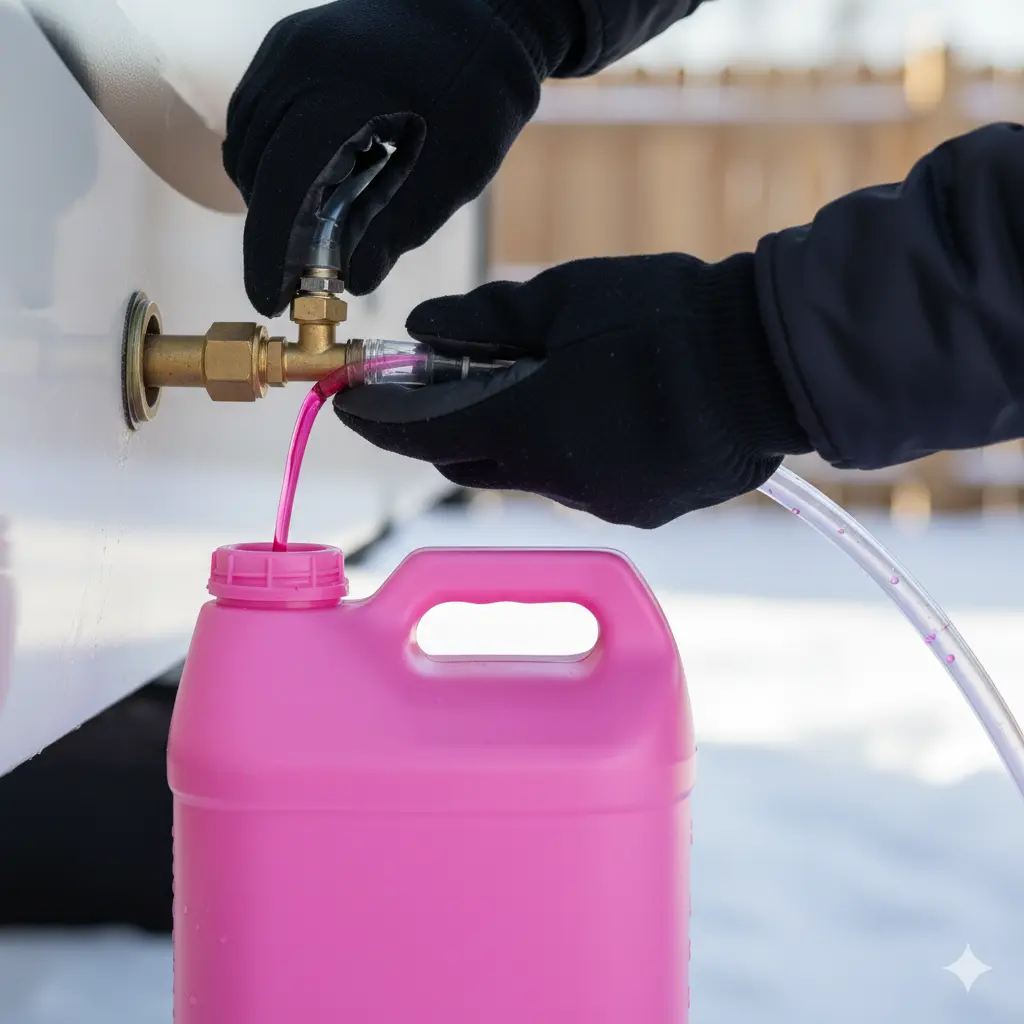
Step 4: Connect the Pump to the Antifreeze Supply
There are two methods to add antifreeze into your system:
- Using a Pump Converter Kit
- Attach the kit’s siphon hose to the antifreeze bottle.
- Switch the valve to draw from the hose instead of the water tank.
- Turn on the water pump to begin circulating antifreeze.
- Using a Hand Pump at the City Water Inlet
- Connect the hand pump hose to the antifreeze container.
- Attach the pump to the city water inlet.
- Manually pump antifreeze into the lines until it appears at each faucet.
Step 5: Run Antifreeze Through All Lines
Start with the closest faucet to the pump:
- Open hot and cold faucets one at a time until pink antifreeze flows steadily.
- Don’t forget the kitchen, bathroom sink, shower, and outdoor shower if equipped.
- Flush the toilet until antifreeze appears in the bowl.
- Run the washing machine or dishwasher briefly (if your RV has one).

Pro Tip: Keep a towel handy — some splashing is normal during this step.
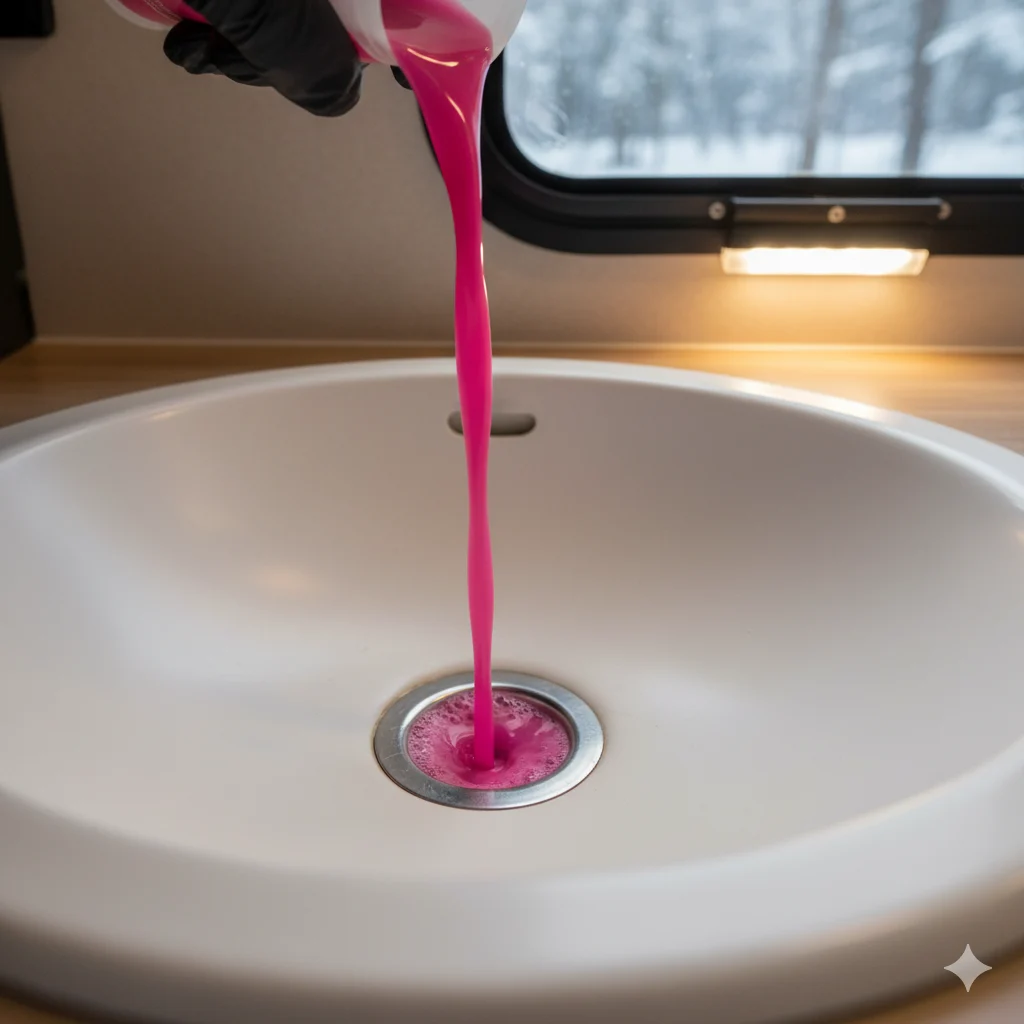
Step 6: Pour Antifreeze Down the Drains
Once antifreeze flows from all faucets, pour about ½ cup into every drain — including sink, shower, and toilet. This protects the traps and seals from freezing and cracking.
You can also pour a small amount into the gray and black water tanks for added protection.
Step 7: Double-Check Everything
Before finishing, double-check:
- Every faucet flows pink antifreeze.
- The water heater is bypassed.
- Drains and traps are filled with antifreeze.
- The pump and tanks are properly sealed.
Once confirmed, close all valves and store the remaining antifreeze in a safe, upright position.
How Much Antifreeze Do You Need?
The average RV requires 2–3 gallons of antifreeze, but large motorhomes may need up to 4–5 gallons.
This depends on the plumbing layout and whether your unit has multiple bathrooms or long pipe runs.
Common Mistakes to Avoid
- Using automotive antifreeze — it’s toxic and unsafe for plumbing.
- Forgetting to bypass the water heater.
- Not running antifreeze through all faucets.
- Failing to pour antifreeze into drains and traps.
- Leaving water in the freshwater tank.
Avoiding these mistakes ensures complete protection from freeze damage.
How to De-Winterize in Spring
When temperatures rise:
- Drain all antifreeze from lines.
- Reconnect the water heater and fill the system with fresh water.
- Flush all faucets until the water runs clear.
- Sanitize the system using a water-bleach mixture (¼ cup bleach per 15 gallons of water).
This removes all traces of antifreeze and prepares your RV for the next season of travel.
Conclusion
Knowing how to put antifreeze in an RV camper is one of the most important maintenance skills for any RV owner. It protects your plumbing, saves costly repairs, and ensures your camper stays ready for adventure when spring returns.
By following this step-by-step process — and using the right type of non-toxic RV antifreeze — you’ll enjoy peace of mind all winter long, knowing your RV is safe from the harsh effects of freezing temperatures.